4L60E Transmission Rebuild Page 1 of 29
Disclaimer: The information provided here is how I did it. I strongly urge you to do your own research and make sure you do it right. No claim is made that the information provided is the only way it should be done, or that you should follow my work without verifying for yourself that it is correct. You are free to do as you choose with the information shared here, but you do so at your own risk.
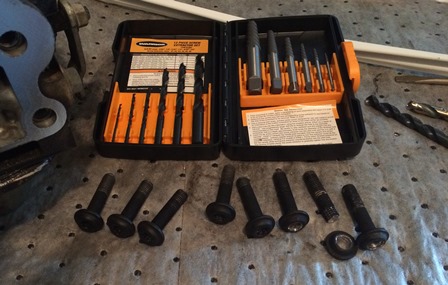
Figure 1. The 4L60E to Dana 300 Adapter Kit from Novak Conversions was purchased. You can find this part at Novak Conversions. This kit necessitates changing out the output shaft of the transmission, so that being the case, we decided to rebuild the transmission first. The first part of this build is going to be an automatic transmission rebuild. This will be shared so if you wish to do your own, you can benefit from the mistakes that were made and not make them yourself. Now to commence the project!
Removing the bellhousing was first. The bolts holding it on are EXTREMELY tight!. These bolts need a Torx Plus 50 bit to be removed. The bit offered by Sonnax was purchased from Amazon, Sonnax part number 77000-HBK. This bit has an 8mm hex on the opposite end. There was difficulty finding a 3/8 drive 6-point socket to fit it. After breaking two 1/4 drive sockets, and stripping out two of the bolt heads, a Craftsman 8mm hex bit with 3/8 drive was purchased, and the 8mm bit was pressed out and the Sonnax bit pressed in. Even with the 3/8 drive breaker bar, it still took a 3ft cheater bar on it to get the rest of the bolts loose. The stripped ones had to be drilled out. I used the Harbor Freight screw extractor kit seen in the photo to get the rest of them out. It worked surprisingly well for as cheap as it was.

Figure 2. The next step is pump removal. The pan was removed, then the bolts shown here that hold the pump in were removed. The tool designed for removing the pump was too expensive, so a large prybar was used on the back side of the pump in an opening next to the valve body. If you copy what was done here, you do so at your own risk. If not done carefully, the case or pump can be damaged. In this case, the pump is not going to be re-used so the risk involved was acceptable. It came out with no damage, even though it was a little stubborn. Not shown is removal of the valve body.
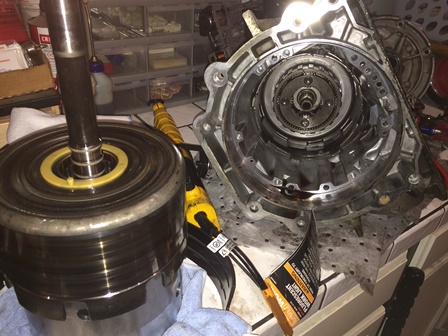
Figure 3. Once the pump is out, the band, reverse input drum and input housing can be removed. As you can see in the photo, the reverse input drum is heavily worn. The band was also burned. The drum will be replaced. Inside the case, you can see the rear planetary, the snap ring and the planetary will be removed. A special type of snap ring plier had to be purchased to get the snap ring off the output shaft. It is called a horseshoe retaining ring plier. The set purchased was the Proto J250G. The Proto pliers worked, but the Lisle 44900 would probably have worked better due to a smaller tip. Both are available from Amazon.
The sunshell was removed and discarded, the teeth looked good, but the factory units are prone to failure, and it will be replaced with the Sonnax Smart Shell, part number 77749-02K. When all this was removed, a couple of the bushings that were in the drums just fell out. This transmission was heavily worn and on the verge of a catastrophic failure. Rebuilding it was definitely the correct thing to do.
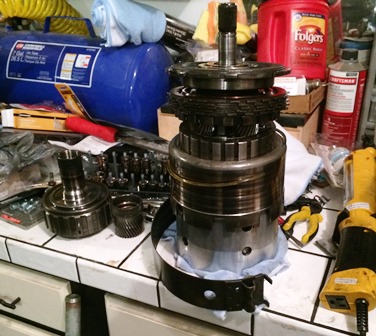
Figure 4. The large snap ring holding the back half of the rotating assembly was removed with a large screwdriver. The center support was removed with a couple good taps on the output shaft with a deadblow hammer, and the remaining clutches were removed. The forward planetary shaft was heavily worn, and the complete assembly will be replaced with a 5-pinion planetary to strengthen the transmission.
The rear planetary was in good shape, however, it is a 4-pinion planetary and will also be replaced with a stronger 5-pinion planetary.
| Pages: 1, 2, 3, 4, 5, 6, 7, 8, 9, 10, 11, 12, 13, 14, 15, 16, 17, 18, 19, 20, 21, 22, 23, 24, 25, 26, 27, 28, 29 |
| 4L60E Rebuild Home | Next--> |
| Contact: Copperhead | As an Amazon Associate I earn from qualifying purchases | © 2019 |