4L60E Transmission Rebuild Page 21 of 29
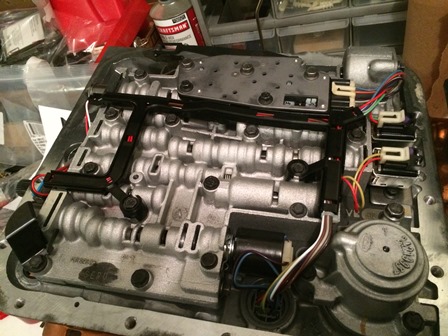
Figure 81. Install the pressure switch, and install the valve body bolts. Torque them all to 120 inch pounds, and follow the factory diagram for the proper sequence. Install the manual shift detent spring. Torque the bolt to 200 inch pounds. Place the wiring harness in position and connect all the wires. Install the TCC solenoid into the case and torque the two bolts to 120 inch pounds. You may have to remove the pwm solenoid to get it in.
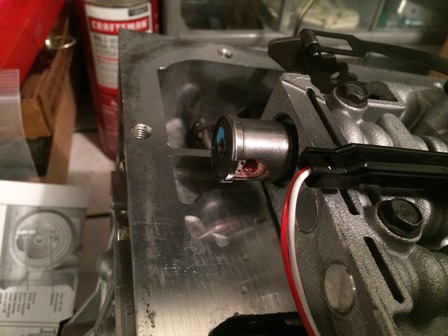
Figure 82. When connecting the 3-2 downshift solenoid wiring, the connector broke off, the solenoid was defective. Progress halts until a new solenoid comes in.
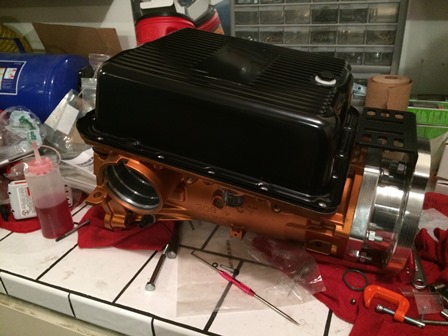
Figure 83. Test fitting the new CFR Perfomance deep transmission pan. This pan was chosen because it is steel, and reasonably priced. The black powdercoating goes very will with the copper paint, and if the transmission gets hit by rock on the trail, the steel pan will bend instead of crack like an aluminum pan will.
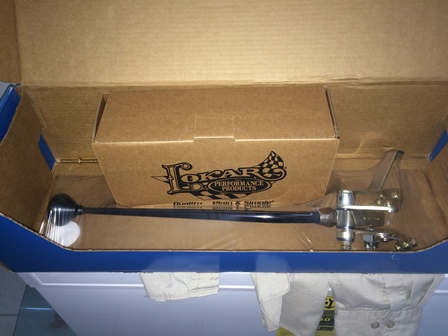
Figure 84. This is the new shifter for the transmission. It is a 16" Lokar midnight black series shifter. It will be installed after the rest of the transmission is done.
| Pages: 1, 2, 3, 4, 5, 6, 7, 8, 9, 10, 11, 12, 13, 14, 15, 16, 17, 18, 19, 20, 21, 22, 23, 24, 25, 26, 27, 28, 29 |
| <--Previous | 4L60E Rebuild Home | Next--> |
| Contact: Copperhead | As an Amazon Associate I earn from qualifying purchases | © 2019 |